I've been on a bit of a romp about HyperSync lately but before this, it's been since August of last year that I looked at HyperSync results. Back at that point in time, it was with firmware v.2.160, which was very good performing. Since that time, I've upgraded from a D700 to a D4 and the firmware has gone up to v.3.003... but I am testing beta firmware V.3.022 which is really promising, so first off, don't use whatever numbers you see here as gospel as being the best performing for your setup... these are the numbers that worked best for my equipment during the time of these tests.
The way that I would normally do the test is using the method that would offer me the most control and/or the wides latitude of adjustments so that I could zero in on the settings that give me the best results. That would mean going over to the HyperSync/HSS tab, clicking the "Manual HyperSync For Standard Channels" box and then using the "Manual HyperSync Offset" slider in small increments until the best results displayed themselves.
Though this is sometimes the best way, it is also the longest way and also and has one downside (one setting for all flashes), the settings where these numbers should be applied would be on the TRANSMITTER, not the RECEIVER, meaning, the unit that goes on the camera is the unit that is affected, so if you had 2 different light sources and wished to use HyperSync, only one light would likely be optimized. Not all that great if you want to HyperSync more than 1 light source and more so if they are different!
Perhaps a better (and slightly faster) solution is to use the "HyperSync For This FlexTT5 As Receiver" section. In that section, there are only drop-down boxes to select from, the first (AC9Flash) has only 9 possible options and the second drop-down box (P2 HyperSync Flash Duration) has 10 possible choices. So, using this section to make your adjustments with means you place the new settings on the receiver FlexTT5, and that means that you can apply different settings to different light sources, each with a possibly different optimized setting that can give you better final results!
So how does one go about finding what settings work best? Well, it is a touch arduous, but one does it manually, one setting at a time, one picture at a time, then one analyzes the photos, sees which setting worked best on a specific light source with a specific version of firmware. Yes, PW often makes changes to these settings when coming out with a different firmware version, and yes, you will have to go through this again if you wish to confirm maximum effectiveness or change the settings to the new and possibly more effective setting for best results.
So, the basic process that I used for this article was:
- make sure the FlexTT5 was at factory settings
- make sure the flash (Nikon SB-80dx in this case), was at full power (1/1).
- jot down the settings somewhere (I used notepad), and take a photo
- change the settings, flash the FlexTT5, and take another photo.
Important Note: You should not be placing the flash into the hot shoe of the FlexTT5, the only way this works is if the flash is sitting in a hot shoe adapter and the wire from the adapter connects to the P2 port of the FlexTT5!!
To start off, I made ONE change in the "P2 HyperSync Flash Duration" section, wrote down the settings, took the photo, and started over. I did this 10 times (starting from a setting of "10 - SLOW" all the way to "1 - FAST".
Looking at all the photos, I noticed that my flash best liked the "1 - FAST" setting... so we kept that setting and moved on to the next control point, the "AC9Flash" selection, and I again made ONE change , wrote down
the settings, took the photo, and started over. I did this 9 times
(starting from a setting of "AB400" all the way to "ZEUS". Yes, that is a lot of plugging, flashing and unplugging of the FlexTT5, but the info is important if you want to get the best out of the setup.
The results? Well I discovered that (as I already mentioned), the flash liked the "1 - FAST" setting, it gave me the brightest exposure, but I know from past experience, that one of the other settings is going to be slightly better than the others. The FLASH DURATION section gives me the brunt of the optimization, and the AC9 area is just going to further fine tune it a touch.
To save you all the excitement, the top 2 settings that gave me the best performance were... #2 was the ULTRA1200 setting and the #1 was the AB1600 setting... but though they were VERY close, the AB1600 edged it out.
"Hang on, if it was very close... how did you know which one was the best"? Good question... I:
- made sure the camera took a picture of the same wall at the exact same distances and camera settings throughout all picture taking.
- loaded the photos in Lightroom 4, made sure the histogram was visible, placed my cursor at the top most center section of the file (darker part of the shot), jotted down the numbers, placed the cursor at the bottom most center section of the file (lightest part of the shot), jotted down the numbers
... and did the same for all 9 photos, and then just looked at the results, the winner is easy to spot!
Let me show you a few photos from the tests. First a couple photos of the results from the "P2 HyperSync For Flash Duration" section. Please be aware that I chose a camera setting that overall is underexposed by about a stop so that it is easier to see the differences. I set the camera settings to ISO 100, F/8 and 1/1000th in all the photos here.:
Factory default settings (7)

P2 setting set to 5

P2 setting set to3

P2 setting set to1

Ok, so the obvious improvement is visible as the exposure increases from one setting to the next. The following section shows the very subtle differences in timing between the different settings of the "AC9 Flash" settings. Again, I have purposely underexposed the photos so that the gradation is more apparent, and under these conditions (a white wall), it will be extremely obvious. With a more natural setting (like anything other than a white wall... lol), and a properly exposed subject, this gradation will be for all intents virtually invisible.
AB-800

AB-400

AB-1600

ABR-800

X-800

X-1600

X-3200

Ultra-1200

Zeus

Oh wow... looks nearly all the same, doesn't it? Fact is, each photo is a little different, but two stand out as being just a little better than the others in terms of amount of light registered and a slight lessening of the gradation
Here are the numbers that I saw when looking at the same 2 points on the histograms of all photos:
NAME TOP Bottom
AB800 58.0 98.0
AB400 59.2 98.0
AB1600 60.8 (#1) 98.6 (#1)
ABR800 58.9 97.6
X800 58.4 96.9
X1600 59.7 98.0
X3200 58.1 96.8
Ultra1200 60.2 (#2) 98.5 (#2)
Zeus 58.1 98.4
I've marked off the top two with the highest numbers representing the ones that gave the most light measured. Again, remember, I am using a beta firmware and real life numbers and results may change once the final firmware is released.
We see that the winner for most light captured is the AB1600 setting. Though the Ultra1200 is a very close #2 setting, we also see it has a slightly higher gradation. Clear winner... AB1600, with the flash duration set to 1 (fastest).
Oh, I got these numbers by using Lightroom v.4.1, using the histogram and % of exposure readings, that is where the above numbers came from. I placed my cursor on the same part of the photo for all photos and just recorded the results. Getting some precise info that was is pretty reliable and accurate.
So let's see some results using this technique in the bright mid day sun:
Ambient, no flash (ISO 100, F/5, 1/1000th)

Flash turned on, ~6 feet away, zoom set to 80 (ISO 100, F/5, 1/1000th), face of subject blown out by around 1.2 stops, but background dropped by 1 stop.

Flash turned on, ~6 feet away, zoom set to 80 (ISO 100, F/7.1, 1/1000th),face of subject blown out by around 0.2 stops and background lowered by about 2 stops.

Now, this exercise is not in how to create a properly exposed shot, but rather to just make a couple of points. In the real life shots, where there is a background, the gradation is not visible at all. That is simply because there is nothing in that area that is being lit, for example like 5 people in a row all equidistant from the flash. If there were, you would see about a 1 stop change in exposure from right to left for the first 10% of the photo when using a speedlight as the light source.
Second point was, though it takes some work, we can match the power of the sun and if it is not too harsh, beat it by a stop or 2 using a single speedlight with no modifiers, a bit of zoom and getting that off camera flash closer to your subject.
So the bottom line? HyperSync is still not totally perfect, but VERY usable as a tool with speedlights. This method's effectiveness increases when you use higher powered light sources like a studio head with long durations.
Edit: June 16th the Montreal Strobist club arranged a meeting and I had a chance to play with HyperSync in a more impromptu and real world situation. The day was hot, hot enough that I came home very sunburned in the face, but I had a chance to test out the results of using HyperSync and one Nikon SB-80dx speedlight and the results are very pleasant!
Photo Info: Nikon D4, Sigma 20mm, single Nikon SB-80dx at full power, ISO 200, F/5.0, 1/1,000th via HyperSync. Bare flash about 15 feet back and camera left.

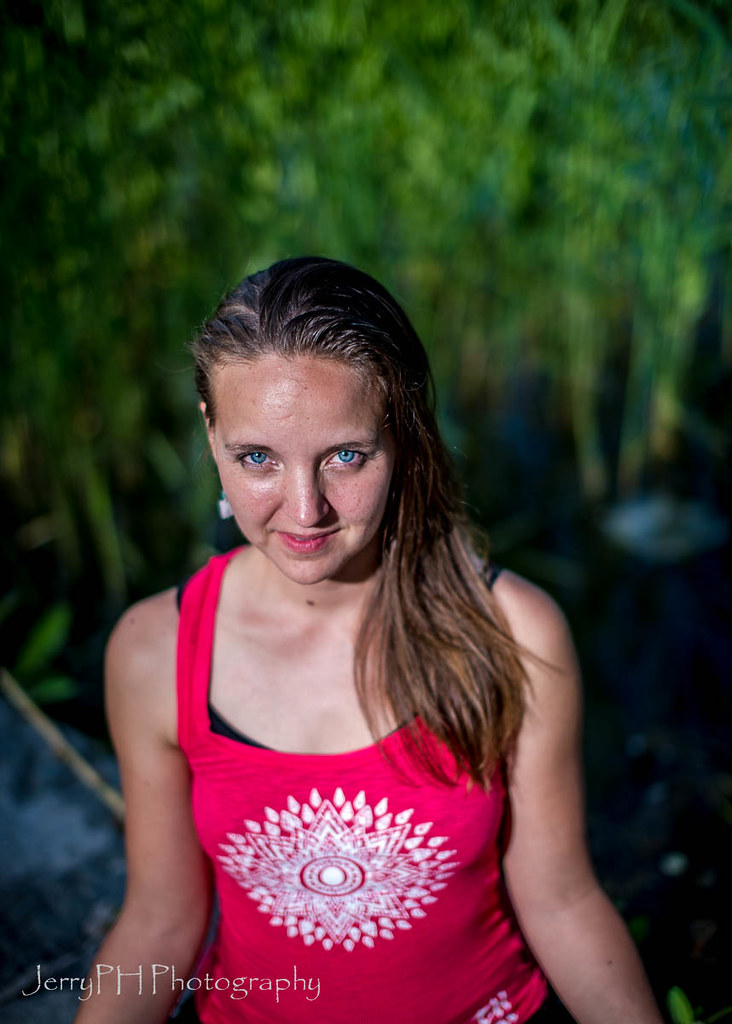
Photo Info: Nikon D4, Sigma 20mm F/1.8 lens, single Nikon SB-80dx at full power, ISO 100, F/4, 1/2000th via HyperSync. Bare flash about 15 feet back and camera left.
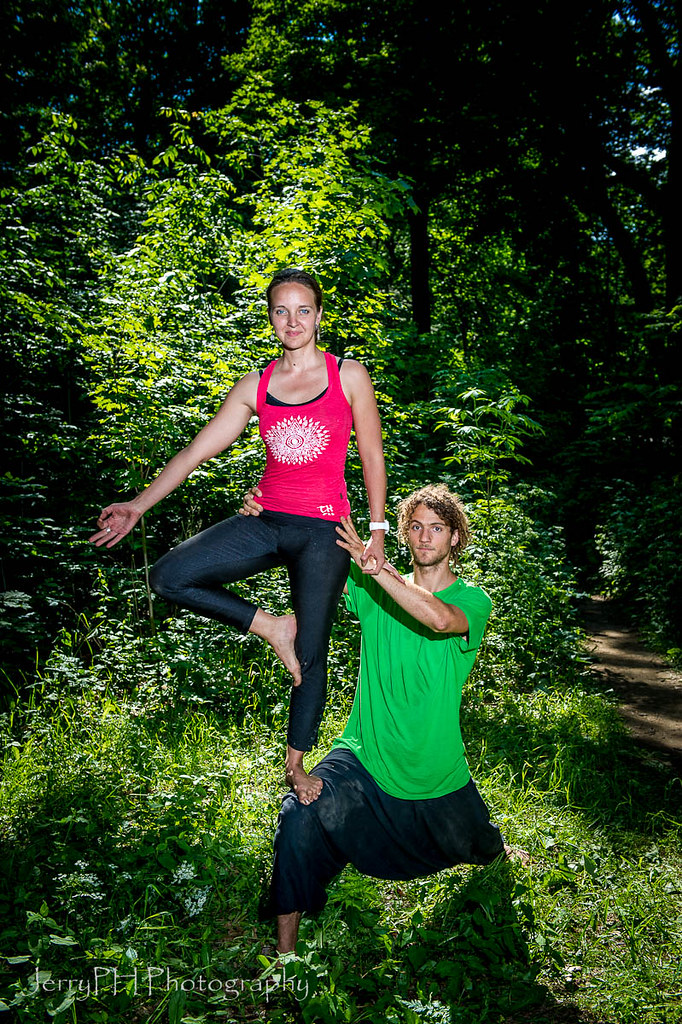
Photo Info: Nikon D4, Sigma 50mm, single Nikon SB-80dx at full power, ISO 50, F/1.4, 1/4000th via HyperSync. Bare flash about 12 feet back and camera left.
There are times to use an ND filter, there are times to use a tiny aperture and there are times to use HyperSync. I am *very* glad that I am able to have all three tools in my kit!
Enjoy!